
Getting Started with Seller2Go
Last updated: August 28, 2026
Your Task / Starting Point
You want to create a new Seller2Go account and complete the basic account settings.
This includes:
- registration
- confirming your email address
- completing your profile details
- connecting to the JTL-Wawi database
- enabling two-factor authentication
- configuring your shop settings
After this section, your account will be set up and ready for further use.
Requirements / Limitations
Before you begin, make sure you have the following information ready:
- a valid email address
- a secure password
- your profile and company details
- the login details for your JTL-Wawi database
- a smartphone with an authenticator app for two-factor authentication
✓ Note:If you want to connect Seller2Go to your JTL-Wawi, you should already have the host, port, database name, username, and password available.
Register an Account
First, open the Seller2Go website. Click “Register” in the top-right corner to create a new account

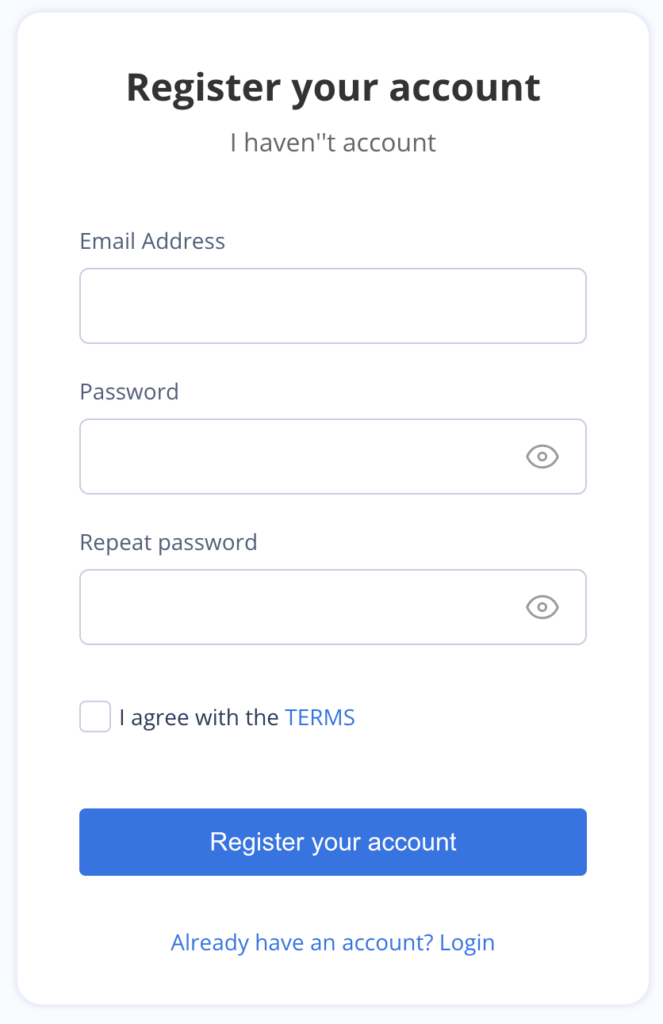
Enter the required login details in the registration form.
Enter the following information:
- Email address
- Password
- Repeat password
Then tick the checkbox to accept the Terms and Conditions and click “Register account”
✓ Note:Make sure both passwords are identical
✓ Note:Use a strong password whenever possible, including uppercase and lowercase letters, numbers, and special characters
Confirm Your Email Address
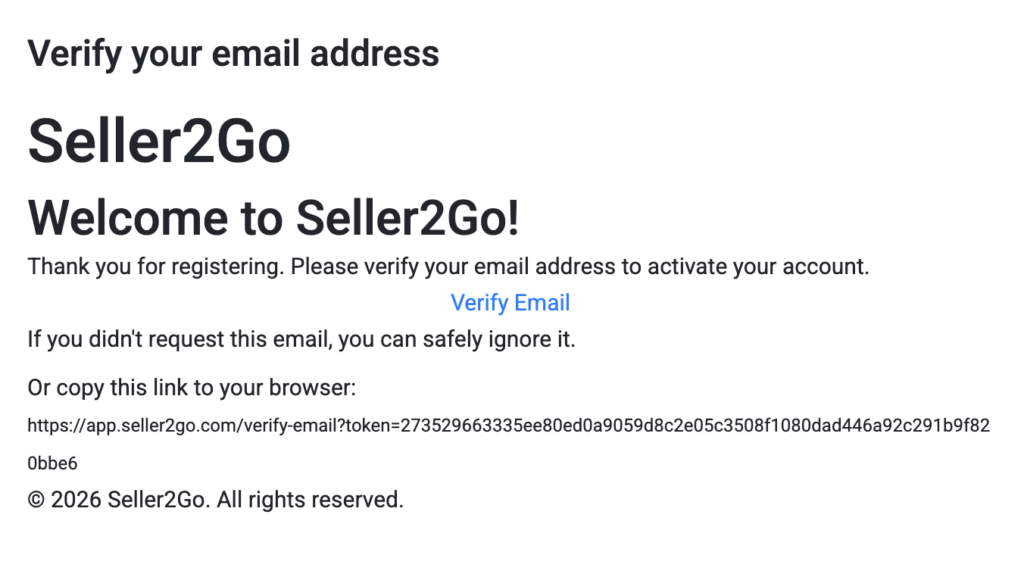
After registration, you will receive an email at the address you provided. Open this message and confirm your email address using the confirmation link included in the email.
How to proceed:
- Open your email inbox.
- Look for the confirmation email from Seller2Go.
- Open the email.
- Click the confirmation link.
Your registration is only fully completed after this confirmation step.
✓Note:Also check your spam or junk folder if the email does not appear in your inbox right away.
✓ Important:Without confirming your email address, your account may not be fully activated or available for use.
Result
- Your Seller2Go account has been created.
- Your email address has been confirmed.
- You can now log in using your account credentials
My Account Section
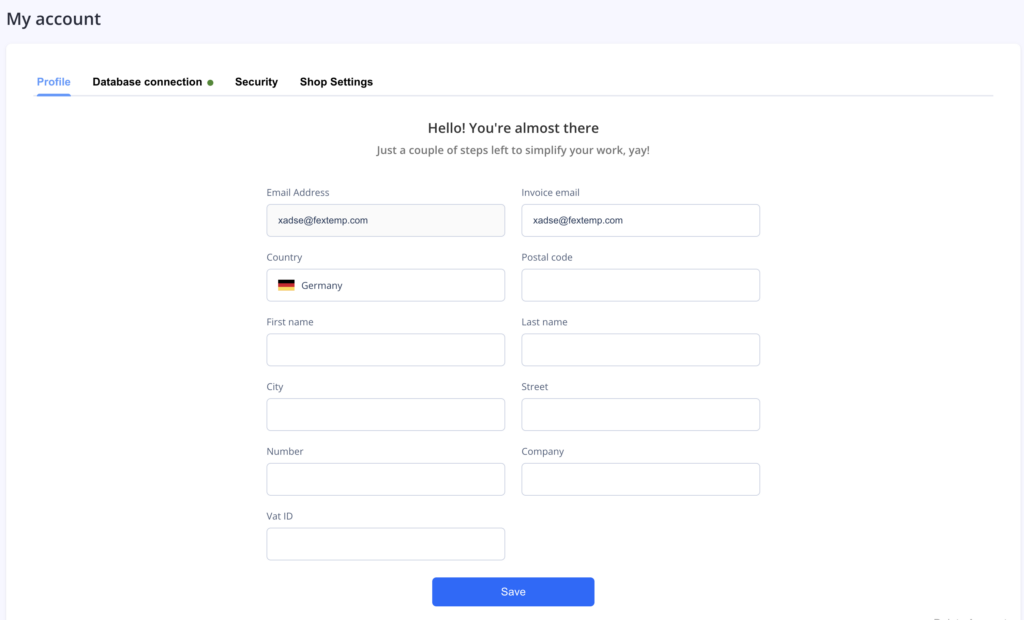
After logging in, you will be taken to the “My Account” section. This is where you manage the most important basic settings of your account.
The following tabs are available in this section:
- Profile
- Database Connection
- Security
- Shop Settings
Each of these tabs serves a specific purpose and should be reviewed during the initial setup.
Profile Tab
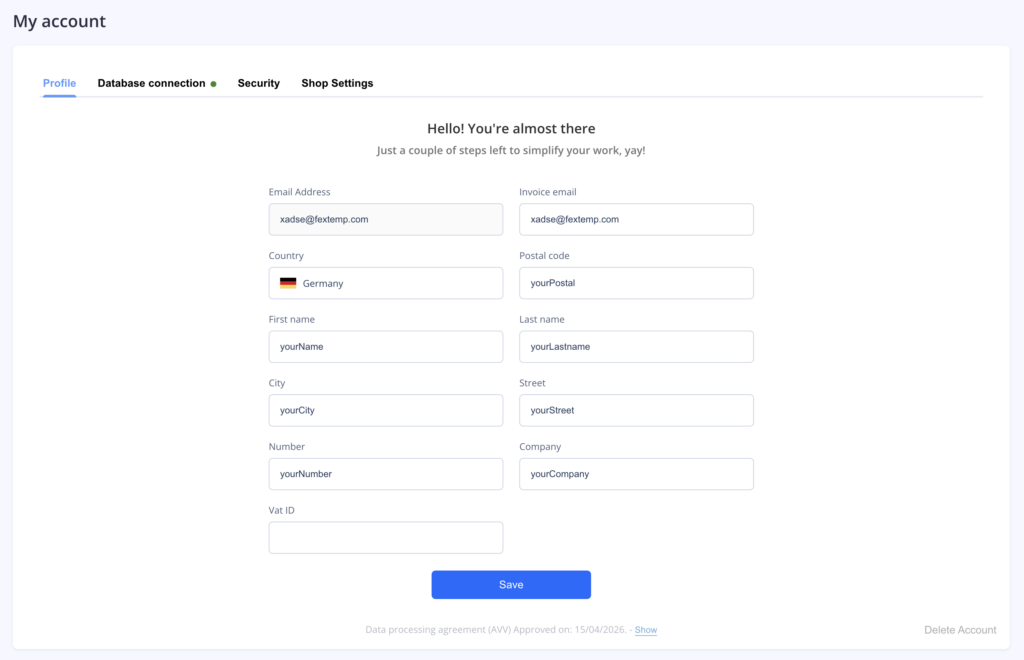
In the “Profile” tab, you can manage your personal and business details.
In this section, you can enter information such as:
- Email address
- Billing email
- Country
- Postal code
- First name
- Last name
- City
- Street
- House number
- Company
- VAT ID
Enter the required information in the relevant fields and then click “Save”.
Purpose of this section
The information in your profile is used to:
- clearly identify your account
- store your billing and contact details
- manage your business information in one central place
✓ Note:Please keep your details as complete as possible. Clean and accurate master data makes the system easier to use later and helps avoid unnecessary follow-up questions.
Result
- Your account details are saved in the system.
- Your user account is ready for the next setup steps
Database Connection Tab
In the “Database Connection” tab, you connect Seller2Go to your JTL-Wawi database
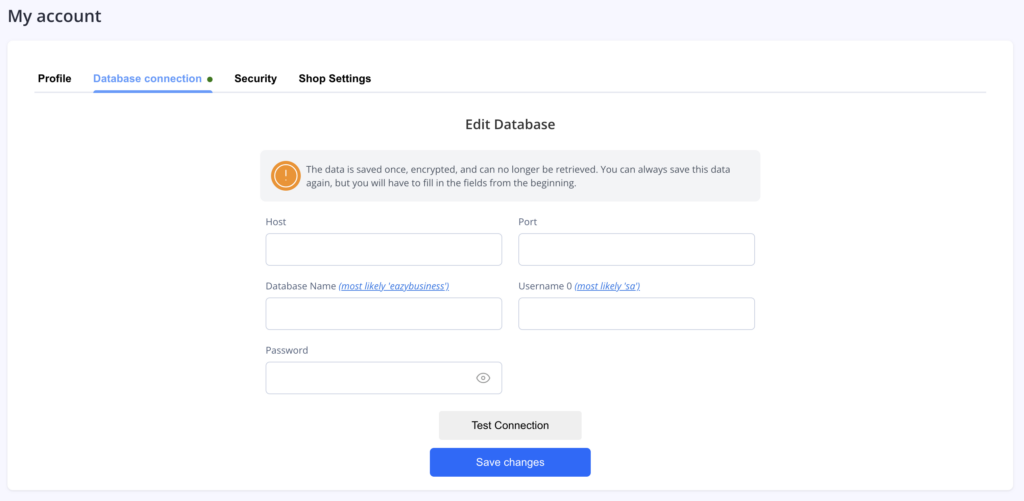
The following details are usually required for the connection:
- Host
- Port
- Database name
- Username
- Password
Enter all details completely.
Then follow these steps:
- Click “Test connection”.
- Wait for the system response.
- If the test is successful, click “Save changes”.
Meaning of the individual fields
- Host
Address of the database server. - Port
Network port used for the database connection. - Database name
Name of the JTL-Wawi database. - Username
Database user with access permissions. - Password
Password for the database user.
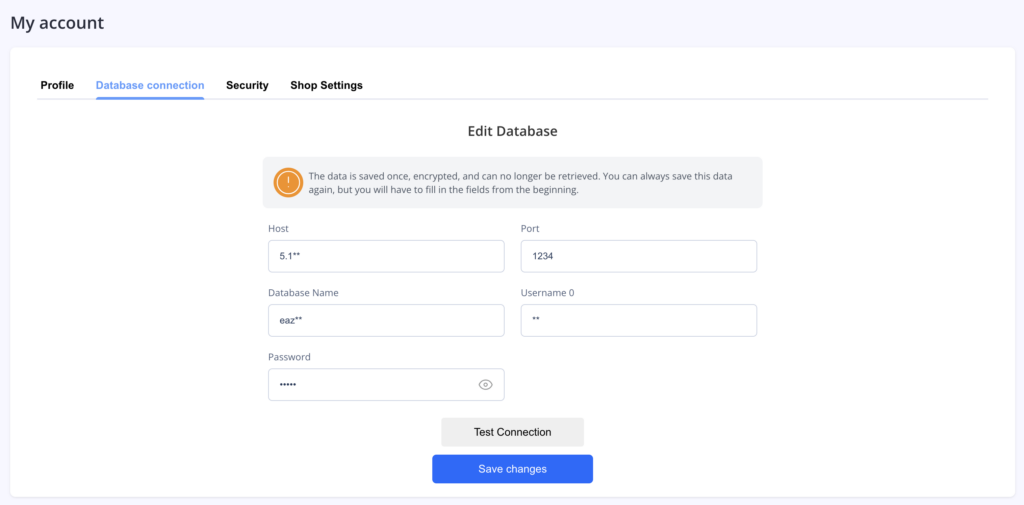
✓ Important:The entered data is saved and encrypted. According to the system notice, it cannot simply be viewed again later. If you want to set up the connection again, you will need to fill in all fields from scratch.
If the connection test fails
Please check the following points in particular:
- Is the host entered correctly?
- Is the port correct?
- Did you use the correct database name?
- Are the username and password correct?
- Is the database server accessible from outside?
- Does the selected user have sufficient permissions?
Result
- Seller2Go is connected to your JTL-Wawi database.
- The connection has been tested successfully and saved.
Security Tab
In the “Security” tab, you can enable two-factor authentication.
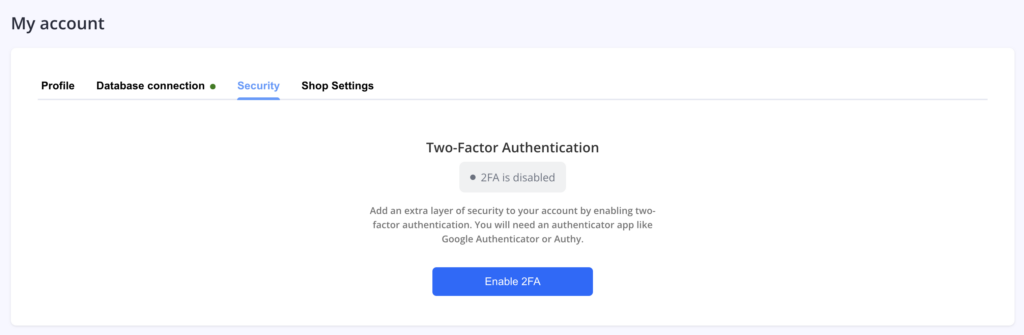
Two-factor authentication significantly increases the security of your account. In addition to your password, you will need a one-time code from an authenticator app when logging in.
How to enable two-factor authentication
- Click “Enable 2FA”.
- Open an authenticator app on your smartphone, for example:
- Google Authenticator
- Authy
- Scan the displayed QR code.
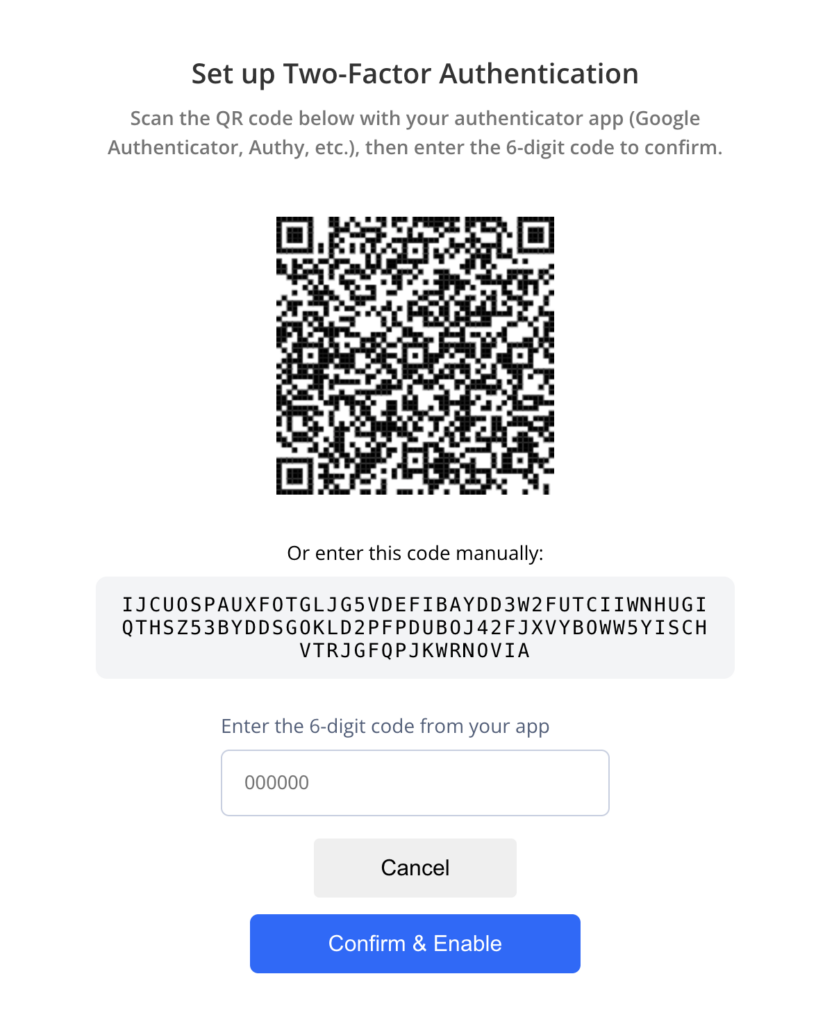
Alternatively, you can enter the displayed setup code manually in the app.
After scanning, your app will generate a six-digit code.
Finally:
- enter the six-digit code in the input field
- click “Confirm & Activate”
If activation is successful, the status will be shown accordingly in the “Security” section.
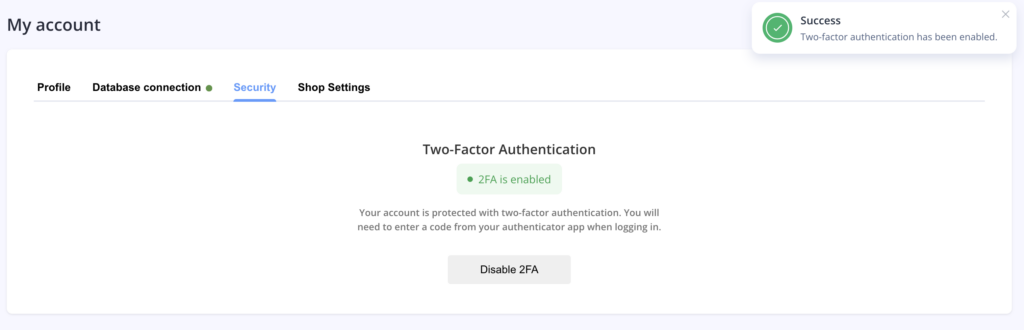
✓Note:From that point on, you will also need the current code from your authenticator app every time you log in.
✓Important:Keep your smartphone safe. Without access to your authenticator app, logging in may become difficult.
Result
- Two-factor authentication is enabled.
- Your account is now protected with an extra layer of security.
Shop Settings Tab
In the “Shop Settings” tab, you can manage notifications and monitoring options for your connected shop.

In the overview, each shop is displayed together with its status, for example “Online”. Click the gear icon to open the detailed configuration.
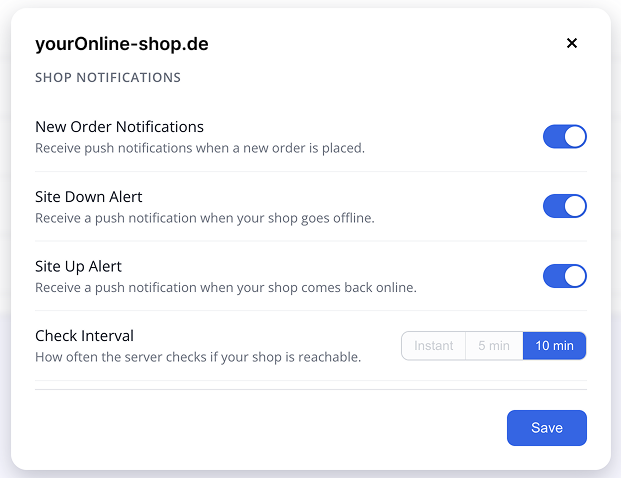
In this section, you can manage options such as:
- New order notifications
- Outage notification
- Recovery notification
You can also define the check interval. This determines how often Seller2Go checks whether your shop is reachable.
Depending on the configuration, the following intervals may be available, for example:
- Instant
- 5 min
- 10 min
After selecting the desired options, click “Save”.
Purpose of this section
With these settings, you define:
- when you receive notifications
- which shop events you are informed about
- how often the availability of the shop is checked
✓ Note:A shorter check interval provides faster notifications, but it is not required in every scenario.
Result
- The selected notifications are enabled.
- Monitoring for your shop has been set up.
Result of This Section
After completing this initial setup, you have finished the most important basic settings in Seller2Go.
Completed:
- account registered
- email address confirmed
- profile details completed
- database connection set up
- two-factor authentication enabled
- shop settings configured
Your Seller2Go account is now ready for the next setup steps.