
JTL-Wawi Bridge
Last updated: September 14, 2026
Connect JTL-Wawi to Seller2Go (Wawi Bridge)
Starting point
You want to connect your JTL-Wawi to Seller2Go so that Seller2Go can access your product, order and customer data. To do this you install the Wawi Bridge – a small program that runs on the server hosting your JTL-Wawi database and establishes a secure connection to Seller2Go from there.
In this section you will:
- open your profile and go to the „Database connection“ tab
- copy the Wawi Bridge download link
- download and start the Wawi Bridge on the Wawi server
- connect to the JTL-Wawi database
- link the Wawi Bridge to your Seller2Go account
- verify the connection
After this section, the Wawi Bridge runs as a Windows service in the background and Seller2Go is permanently connected to your JTL-Wawi.
Duration: approx. 5 minutes
Requirements
- an active Seller2Go account (e-mail address confirmed, two-factor authentication set up)
- access to the Windows server running JTL-Wawi / SQL Server (e.g. via Remote Desktop)
- administrator rights on that server
- username and password for the SQL Server (usually the „sa“ user)
- your smartphone with the authenticator app for the 2FA code
✓ Note: The Wawi Bridge establishes the connection from your server to Seller2Go. You do not need to open any ports in your firewall, and your database credentials never leave your server.
✓ Note: The Wawi Bridge replaces the „Direct connection“ (host, port, database name etc.) in the „Database connection“ tab. It is the recommended option. If you have already entered a direct connection, you can still switch to the Wawi Bridge.
Open your profile and select the „Database connection“ tab
- Log in to Seller2Go at app.seller2go.com with your e-mail address and password.
- Click „Profile“ in the top right. The „My account“ area opens.
- Select the „Database connection“ tab there.

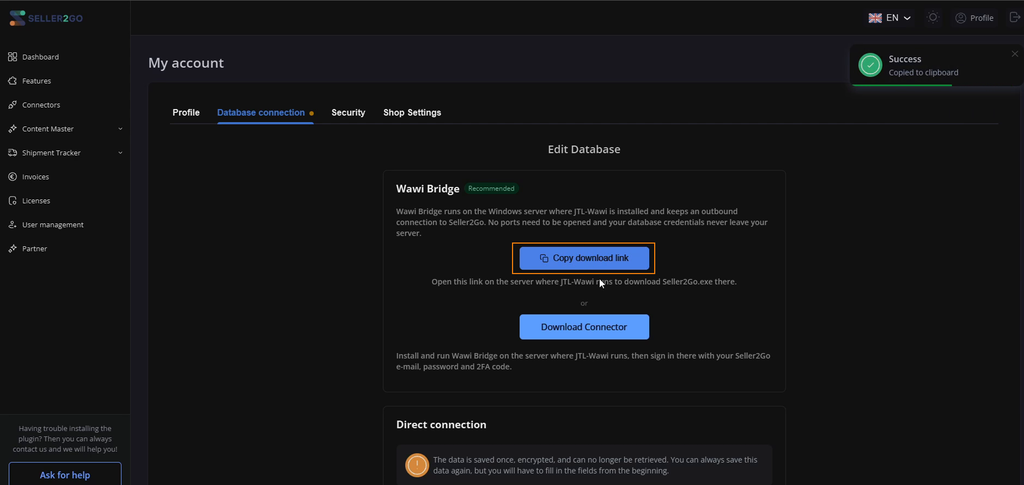
On this tab, under the heading „Edit Database“, you will see two sections: „Wawi Bridge“ (marked „Recommended“) and, below it, „Direct connection“. For the following steps you only need the „Wawi Bridge“ section.
✓ Note: An orange dot next to „Database connection“ means that no connection to your JTL-Wawi exists yet. After successful setup, the dot turns green.
Copy the download link
In the „Wawi Bridge“ section, click „Copy download link“. The download link is now in your clipboard; Seller2Go confirms this in the top right with the message „Copied to clipboard“.
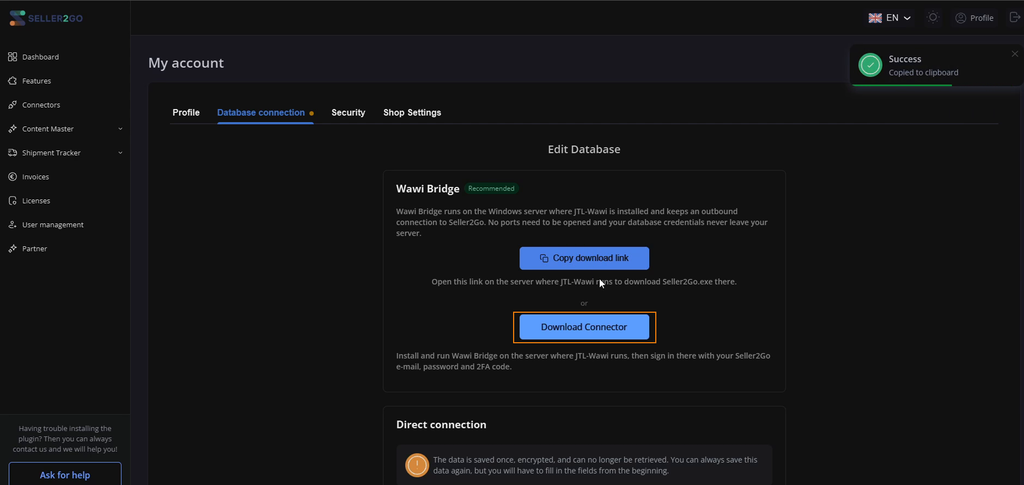
✓ Note: Alternatively, you can use „Download Connector“ to download the file directly to the computer you are currently working on. The link is usually handier, though, because the file belongs on the Wawi server, not on your work computer.
✓ Important: The download link is tied to your Seller2Go account. Do not share it with third parties.
Download and start the Wawi Bridge on the server
Connect to the server running your JTL-Wawi database (e.g. via Remote Desktop). Open a browser there, paste the copied link into the address bar and press Enter.
The file Seller2Go.zip is downloaded (approx. 65 MB).
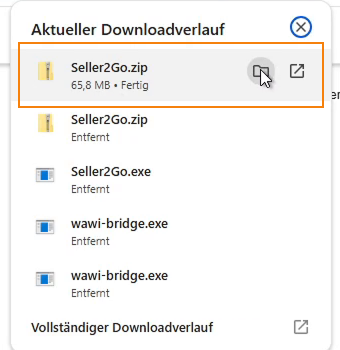
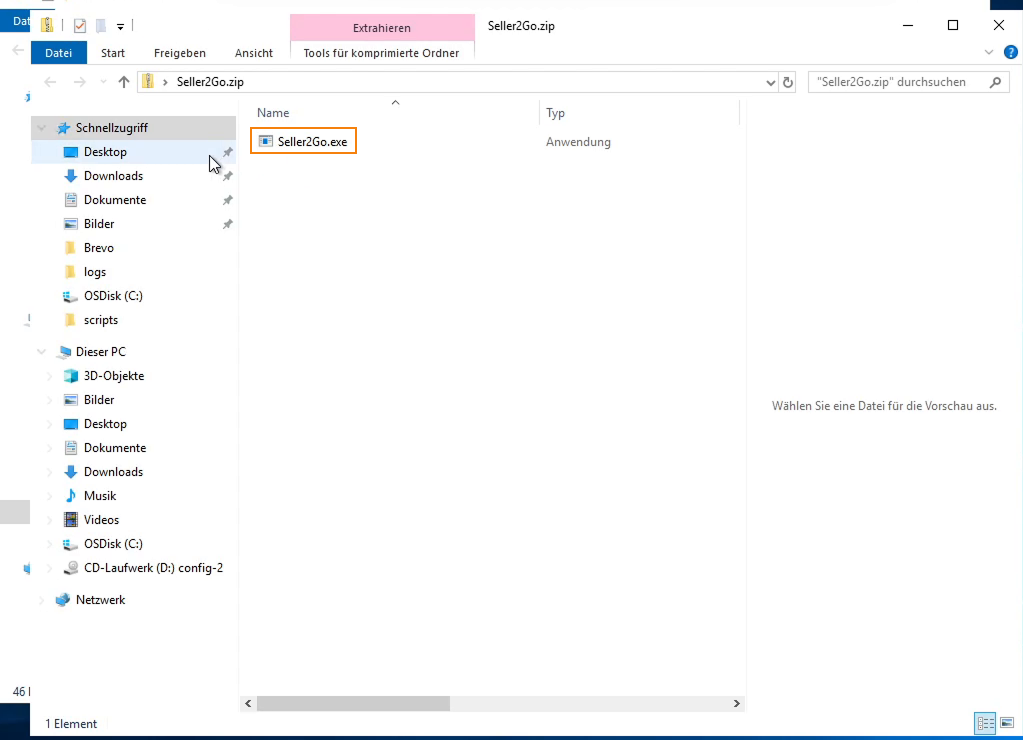
Open the „Downloads“ folder, right-click Seller2Go.zip and choose „Extract All…“. The extracted folder contains the file Seller2Go.exe. Double-click it to start.
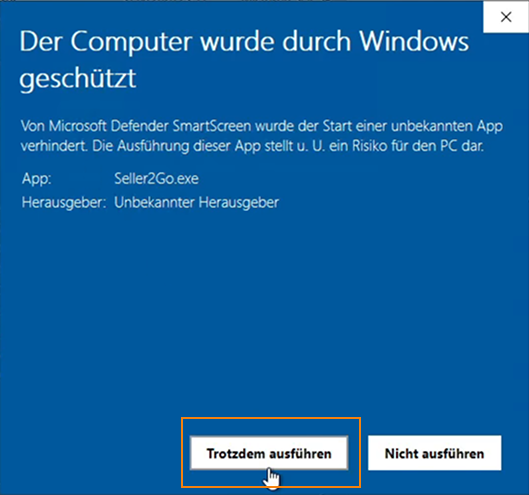
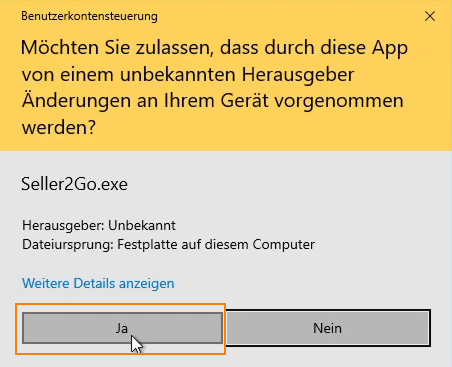
✓ Note: On first start, Windows may show the message „Windows protected your PC“ (Microsoft Defender SmartScreen). Click „More info“ and then „Run anyway“. Then confirm the User Account Control prompt with „Yes“ – the Wawi Bridge needs administrator rights to register itself as a Windows service.
Start the setup
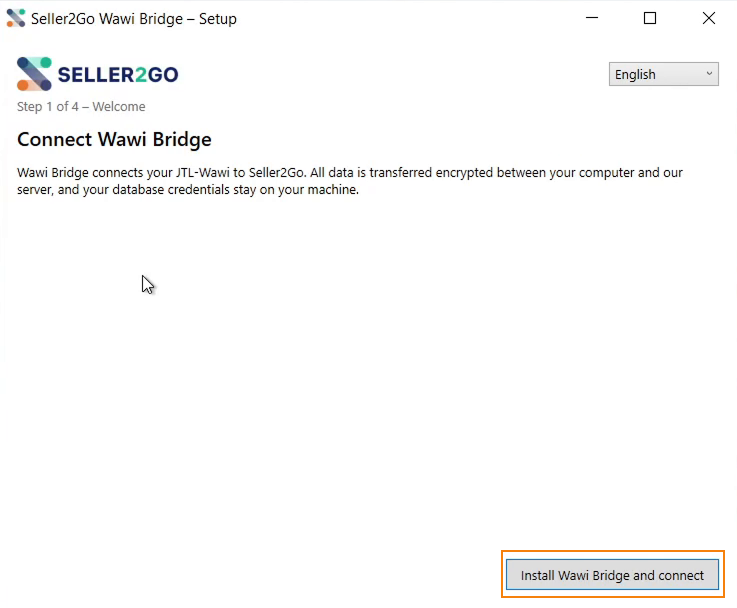
The setup wizard „Seller2Go Wawi Bridge – Setup“ opens. You can switch the language in the top right (German/English).
Click „Install Wawi Bridge and connect“.
„Database“ step
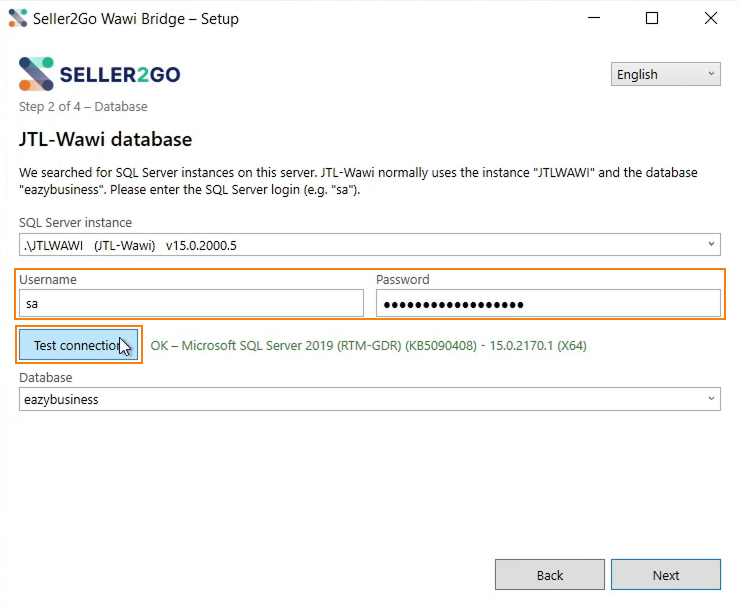
The Wawi Bridge automatically searches for SQL Server instances on this server. SQL Server instance (usually „.\JTLWAWI“) and Database (usually „eazybusiness“) are therefore usually pre-selected.
- Enter the SQL Server user under Username (e.g. „sa“).
- Enter the corresponding Password.
- Click „Test connection“. On success, a green message „OK – Microsoft SQL Server …“ appears next to the button.
- Check that your Wawi database is selected under Database.
- Click „Next“.
✓ Note: If you have several clients (Mandanten) or several databases, select the correct one from the Database list (e.g. „eazybusiness“ or „Mandant_1“).
✓ Important: Your database credentials are stored locally on this server only and are never transmitted to Seller2Go.
„Sign-in“ step
Now sign in with your Seller2Go account to link this server to your account.
- Enter your Seller2Go E-mail and Password.
- Click „Sign in & connect“.
- If your account is protected by two-factor authentication, the field „2FA code (from your authenticator app)“ appears. Enter the current 6-digit code and click „Sign in & connect“ again.
- After a successful sign-in, the „Install“ button becomes active. Click it.
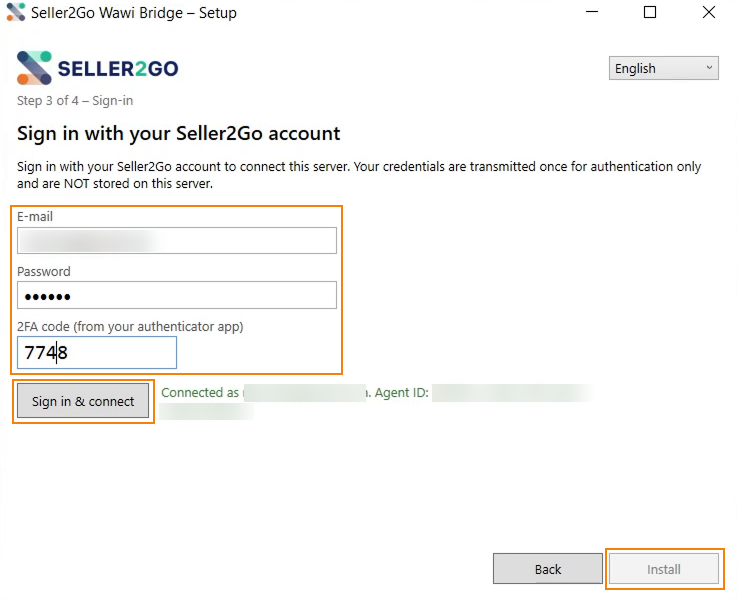
✓ Note: Your Seller2Go credentials are transmitted to Seller2Go once for sign-in only and are not stored on the server.
„Installation & Status“ step
The Wawi Bridge is installed and started as a Windows service. After a few seconds the status page shows:
- Windows service: running
- Connection to Seller2Go: connected since …
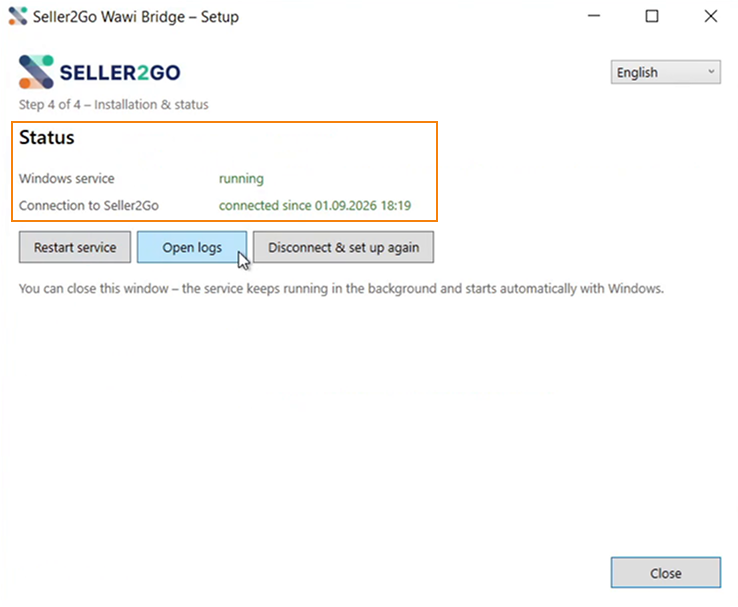
You can now close the window with „Close“. The service keeps running in the background and starts automatically with Windows – you do not need to start the Wawi Bridge manually.
✓ Note: Right after installation, „no status message from the service yet“ may be shown briefly. Wait a few seconds – the display refreshes automatically.
Verify the connection in Seller2Go
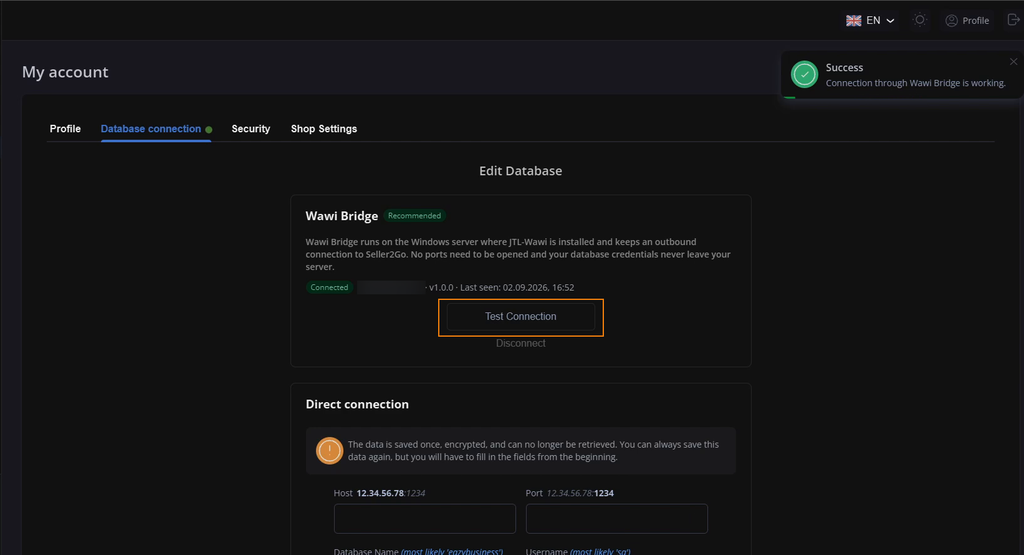
Switch back to your browser and go to Profile → „Database connection“ tab. The „Wawi Bridge“ section now shows the status „Connected“ together with the server name, version and time of the last status report. You can check the connection at any time with „Test Connection“.
Disconnect or set up the Wawi Bridge again
If you move to a different server, want to use another Seller2Go account or want to remove the connection:
- Start Seller2Go.exe on the server again.
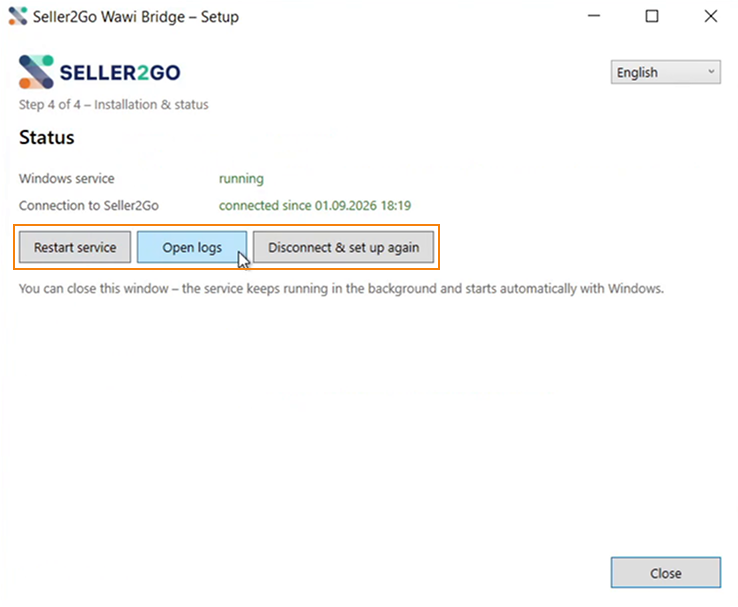
- On the status page, click „Disconnect & set up again“.
- Then run through the setup again as described above.
The status page also offers „Restart service“ and „Open logs“ – useful if our support team ever asks you for them.
✓ Note: Alternatively, you can remove the connection in Seller2Go under Profile → „Database connection“ → „Disconnect“.
Result of this section
In this section you have:
- opened your profile and the „Database connection“ tab
- copied the Wawi Bridge download link
- downloaded and started the Wawi Bridge on your Wawi server
- established and tested the connection to the JTL-Wawi database
- linked the Wawi Bridge to your Seller2Go account
- verified the connection in Seller2Go
Your JTL-Wawi is now permanently connected to Seller2Go and ready for the other modules (e.g. Content Master or Listing Inspector).
✓ Note: Trouble installing? Use „Ask for help“ in the bottom left of Seller2Go to reach our support team at any time.