
JTL-Shop Connection
Last updated: August 28, 2026
Dashboard Without a Connected Shop
When you open Seller2Go for the first time and no shop is connected yet, the dashboard will appear empty. The system will indicate that no shops have been registered yet.
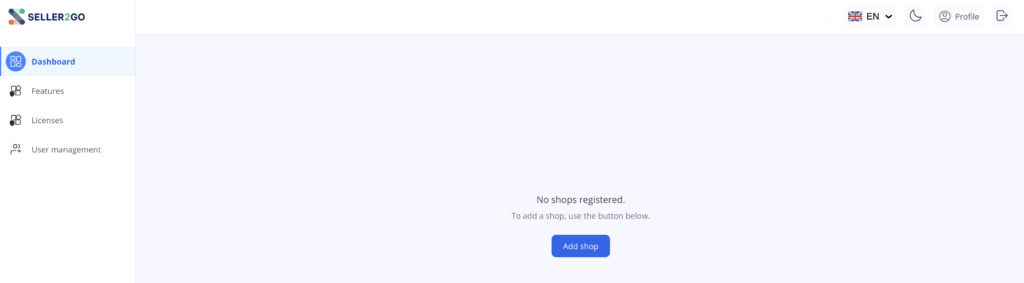
At this stage, no live data is available yet. To continue, click “Add shop”.
The following is not yet available in this state:
- no shop statistics
- no orders
- no revenue data
- no shop status display
Purpose of the next step
By adding a shop, Seller2Go is connected to your JTL-Shop. Only then can the system retrieve and display relevant data.
Why a Plugin Must Be Installed
After clicking “Add shop”, you will be taken to an information page. It explains how Seller2Go works together with your shop.
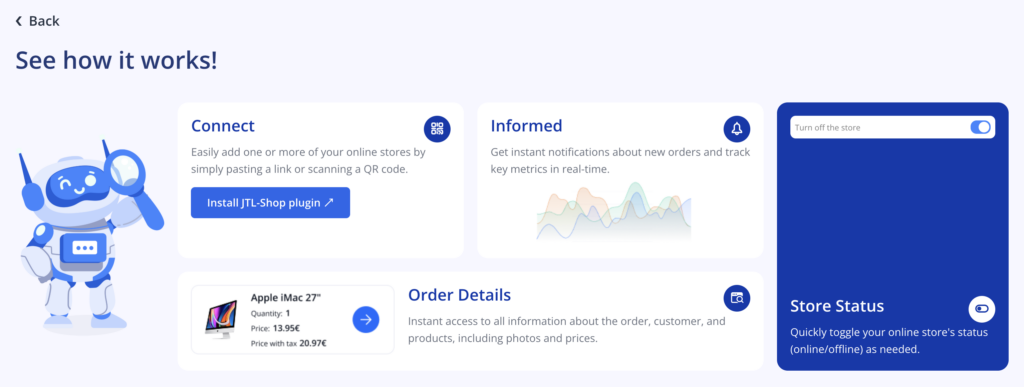
This page shows what the connection is used for.
After the plugin is installed, Seller2Go can provide the following information, for example:
- real-time notifications
- key figures and metrics
- order details
- shop status
- a central overview of connected shops
✓ Note:The connection is not made through the Seller2Go account alone. Your JTL-Shop must also be extended with the appropriate plugin.
Choose a Plan
Before completing the connection, you may be asked to choose a plan, depending on the page or workflow. In your example, the free plan was selected first.
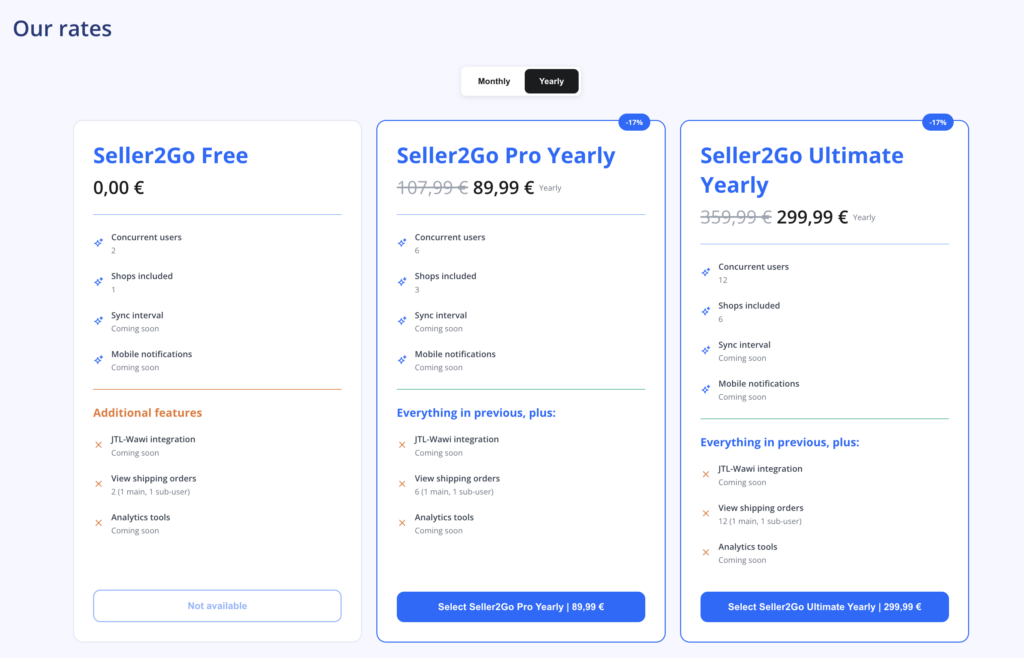
Depending on the plan, the scope and number of available features may vary.
Examples of possible differences between plans:
- number of simultaneous users
- number of included shops
- notification features
- analytics features
- integration scope
✓ Note:The free plan may be enough to get started, as long as the included features match your setup.
✓ Important:Before making your choice, check which plan best fits the number of shops you have and your intended use case.
Open the Seller2Go Plugin in the JTL Extension Store
Click the “Install JTL-Shop Plugin” button on the information page. You will then be redirected to the JTL Extension Store.
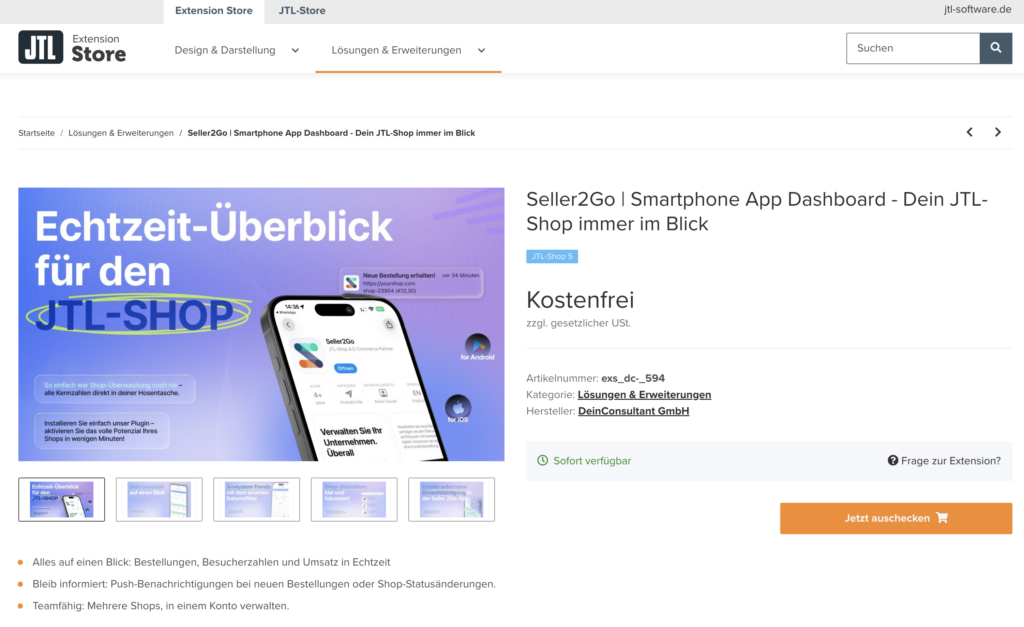
There, you will find the extension “Seller2Go | Smartphone App Dashboard – Keep your JTL shop in view at all times”.
On this page, you can check:
- The product name
- Compatibility with JTL-Shop
- The extension provider
- Whether the extension is free or paid
- The product description and included features
If everything looks right, you can start the order process.
Order the Plugin
The extension will be shown in the JTL checkout. In this example, the plugin is free.
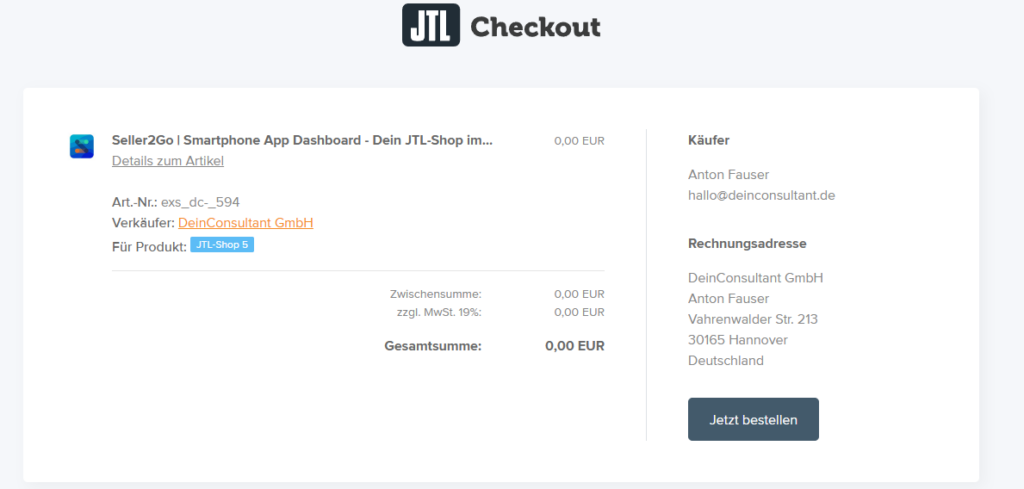
Check the displayed information and then click “Order now”.
Before placing the order, make sure:
- The selected product is correct.
- The correct buyer is entered.
- The billing address is correct.
- The shop assignment is correct.
After the order is completed, the license will be created.
Receive the License by Email
After placing the order, you will receive a confirmation email. This email also contains the license key.
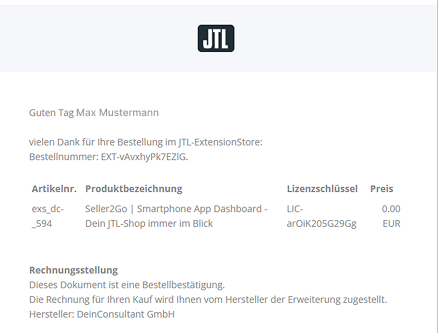
The email confirms that the extension was ordered successfully.
The email usually includes:
- Order confirmation
- Product name
- Item number
- License key
- Price
✓ Note:Keep this email, as it contains important license information.
Check the License in the Customer Center
After placing the order, the license will also appear in the JTL Customer Center or in the shop administration area.

There, the extension should be listed together with its license key.
Make sure that the license is assigned to the correct shop or domain.
Check in particular:
- Is the Seller2Go extension listed?
- Is the license key available?
- Is the correct domain stored?
- Is the license active and valid?
✓ Important:The domain assignment must be correct so that the plugin can later be connected properly to your JTL shop.
Assign the Plugin in JTL-Shop
Next, go to the backend of your JTL-Shop. There, open the “My Purchases” section.
If your Customer Center is already connected, the purchased extension will be displayed there.

In the list of unassigned licenses, you will see the Seller2Go plugin. Click “Bind to this online shop”.
Purpose of this step
By binding the license, the extension is assigned to the specific shop and can then be installed in the next step.
✓ Note:This step is required before the plugin can actually be installed and activated in the shop.
Install the Plugin
After the license has been bound, the plugin will appear in the bound licenses section with an available version and an Install button.

Click “Install” to set up the extension in your JTL-Shop.
Once the installation has been completed successfully, the extension will still be shown in the bound licenses section, but there will no longer be any pending installation step.
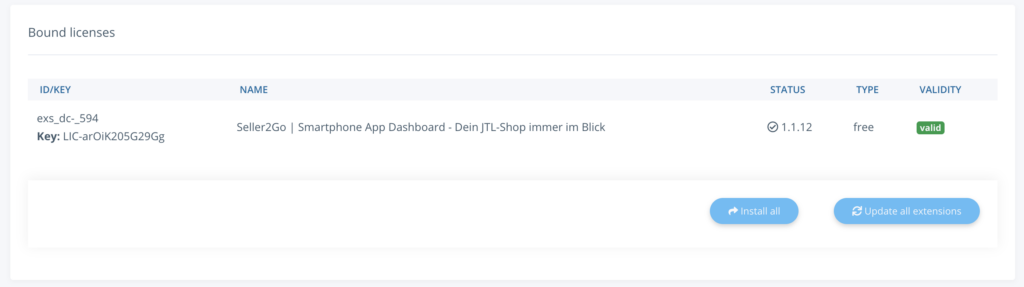
How to recognize that the installation was successful
- the license is bound
- the status is valid
- the extension is listed as installed
- there is no longer any open assignment shown
Check the Plugin in the Plugin Manager
You can also verify in the plugin manager of your JTL-Shop whether the Seller2Go plugin has been installed correctly.
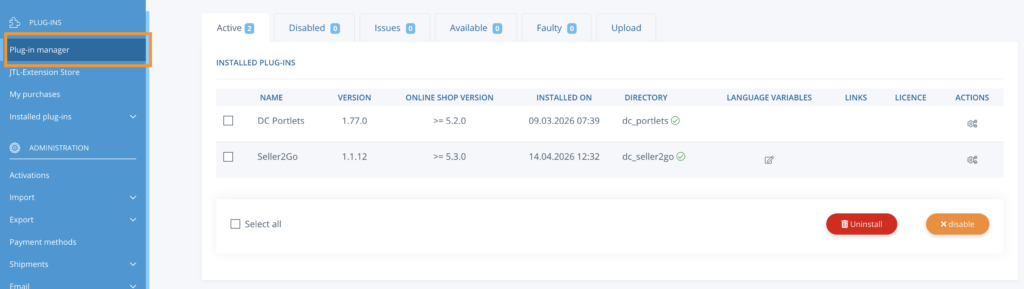
The plugin “Seller2Go” should appear there in the list of installed plugins.
In the plugin manager, you can check details such as:
- plugin name
- installed version
- compatibility with the shop version
- installation date
- plugin directory
- license status
✓ Note:If the plugin appears in the plugin manager, this provides additional technical confirmation that the installation has been completed successfully.
Check the Shop in Seller2Go
After the installation and connection have been completed successfully, the shop will also appear in Seller2Go.

It will now be shown in the settings or in the shop overview. Depending on its status, you may also see a label such as “Online.”
This means:
- the connection between the shop and Seller2Go has been established
- Seller2Go recognizes the connected shop
- additional data can now be loaded and analyzed
Dashboard After the Shop Has Been Connected Successfully
As soon as the shop has been connected successfully, the dashboard will display real content instead of the previous empty state.
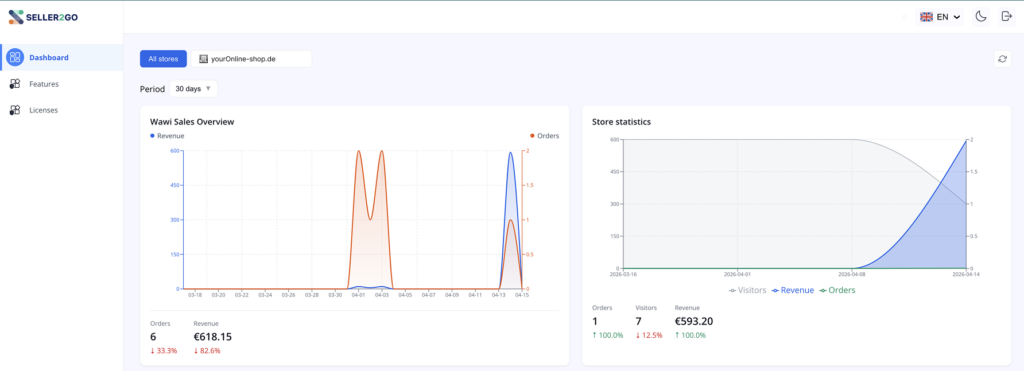
Depending on the available data and the selected time period, the dashboard may show information such as:
- sales overview
- revenue
- orders
- visitors
- shop statistics
- order lists
- analyses by payment method
- analyses by customer group
You can also adjust the time range for the displayed metrics, for example to 30 days.
Possible benefits of the dashboard
- a central overview of the most important shop data
- quick access to current developments
- early detection of unusual patterns
- direct visibility into revenue and order trends
✓ Note:The data visible in the dashboard depends on whether shop data is already available and how far synchronization or data provisioning has progressed.
Result of This Section
After completing these steps, your JTL-Shop has been successfully connected to Seller2Go.
Completed:
- shop added in Seller2Go
- plan selected
- Seller2Go plugin opened in the JTL Extension Store
- plugin ordered
- license received by email
- license checked in the Customer Center
- license bound to the online shop
- plugin installed
- plugin checked in the plugin manager
- shop visible in Seller2Go
- dashboard with initial key metrics available
This completes the basic technical connection of your shop.
What’s Next?
After your shop has been connected successfully, you can move on to additional Seller2Go areas that can be described and configured, for example:
- features
- licenses
- user management
- notifications
- reports and detailed views