
Mobile App Connector
Last updated: August 28, 2026
Your Task / Starting Point
Once your JTL-Shop has been successfully connected to Seller2Go, you can also set up the mobile app. This allows you to keep track of important shop information while on the go.
Using the mobile app, you can for example:
- view connected shops
- receive notifications about new orders
- monitor the online status of your shop
- configure push notifications
- manage multiple shops
The connection between the app and the shop is established via a QR code generated in the Seller2Go plugin.
Requirements / Limitations
Before you connect the mobile app, make sure the following steps have already been completed:
- your Seller2Go account has been set up
- your JTL-Shop has been connected successfully
- the Seller2Go plugin has been installed in your JTL-Shop
- you have access to the JTL-Shop admin area
- you have a smartphone with access to the Google Play Store or the Apple App Store
✓ Note:The mobile app is not connected to the shop automatically. The connection must be established once via a QR code.
✓ Important:
There are two different QR codes in this process:
- QR codes for downloading the app
- the QR code used to connect the shop to the app
Open the Mobile Connection in the Plugin
To connect the mobile app to your shop, first open the Plugin Manager in your JTL-Shop and then open the installed Seller2Go plugin.
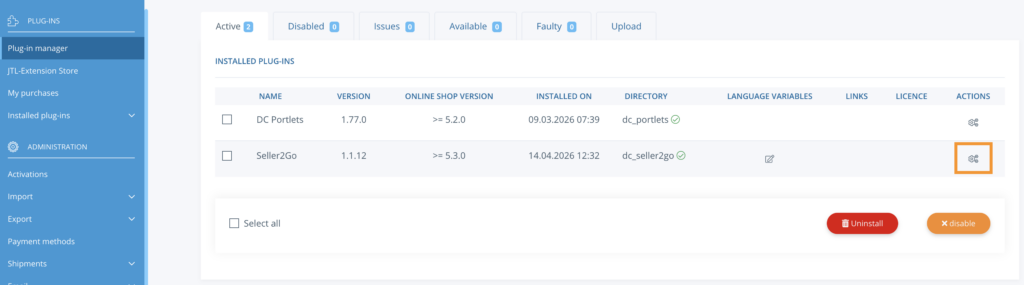
From the plugin settings, you can access the plugin’s detailed view. Depending on the setup, several tabs may be available there, such as App, Documentation, and License.
Purpose of this section
Here you can find:
- information about connecting the mobile app
- links or QR codes for downloading the app
- the section used to connect the shop via QR code
Download the App
In the plugin section, you will find information about how the plugin is used together with the mobile app. You will also find direct links to the app for Android and iPhone.
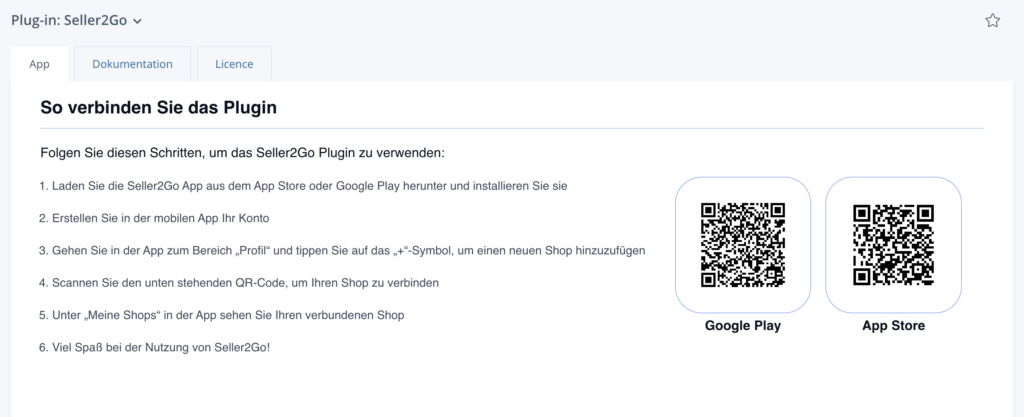
The app can be installed via the following channels:
- Google Play
- Apple App Store
Procedure
- Open the appropriate app store on your smartphone.
- Download the Seller2Go app.
- Install the app on your device.
✓ Note:The QR codes shown on this page are only used to download the mobile app, not yet to connect the shop to the app.
Prepare the Shop Connection on the Plugin Page
After installing the app, switch to the “Connect shop” section in the plugin.
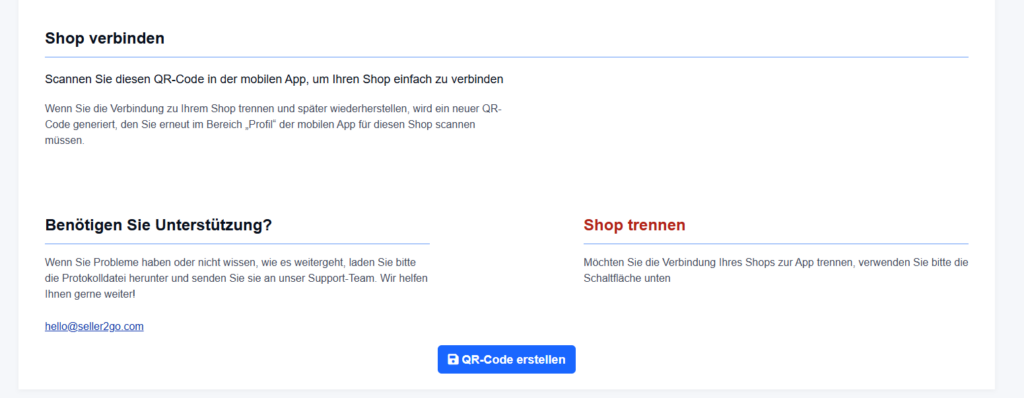
This section explains that the shop is linked to the mobile app via a QR code.
This area typically includes functions such as:
- generate a QR code for the shop connection
- access a help section in case of problems
- download a log file
- disconnect the shop connection again
Important notes from this section
- If the connection is later disconnected and set up again, a new QR code will be generated.
- This new code must then be scanned again in the mobile app.
- If problems occur, a log file can be downloaded and sent to support.
✓ Note:The “Create QR code” button is the starting point for pairing the app with the shop.
Generate the QR Code for the Mobile Connection
Click “Create QR code.” A unique QR code for connecting your shop to the mobile app will then be displayed.
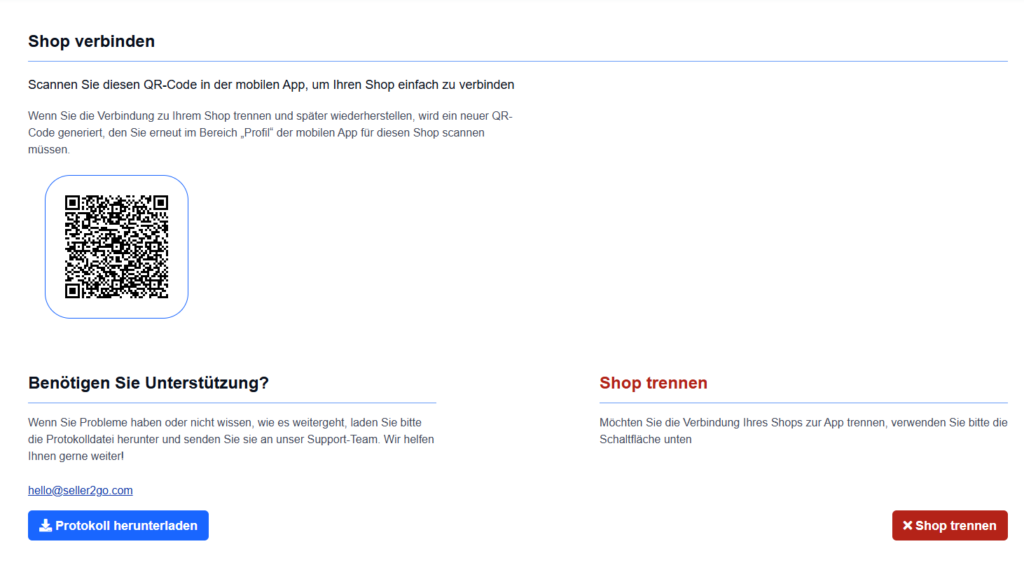
This QR code is not intended for downloading the app. It is used exclusively to connect your specific shop to the mobile app.
Important points
- the QR code is shop-specific
- it is scanned in the mobile app
- if the connection is set up again later, a new QR code may be required
Open the Mobile App
Now open the Seller2Go app on your smartphone.
If no shop has been added yet, you will first see an empty shop overview. At this stage, the app indicates that no shop has been connected yet.
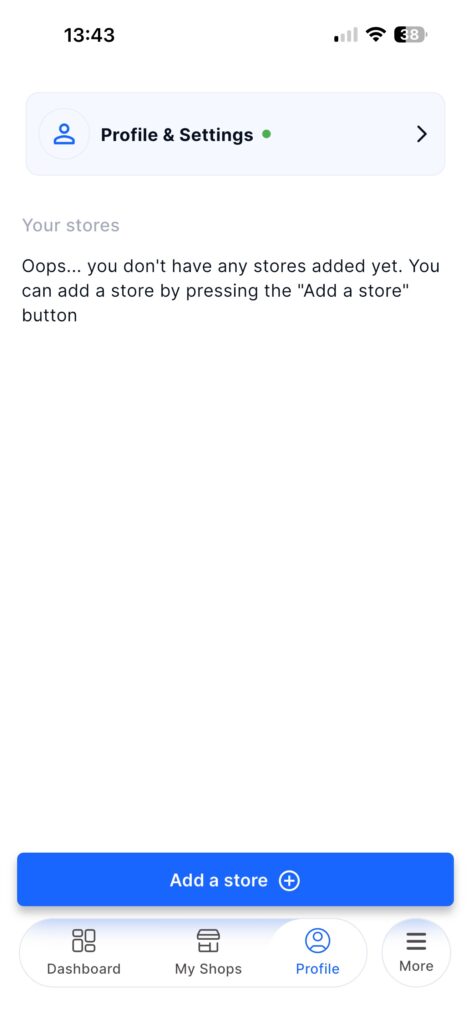
In this state, you will typically see:
- the “Profile & Settings” area
- no connected shops yet
- an “Add a store” button
To start the connection, tap “Add a store.”
Step 1: Add the Shop in the App
After tapping “Add a store,” the form for adding a new shop opens. In your workflow, this is the point where the scan process begins or where the app allows you to capture the QR code.
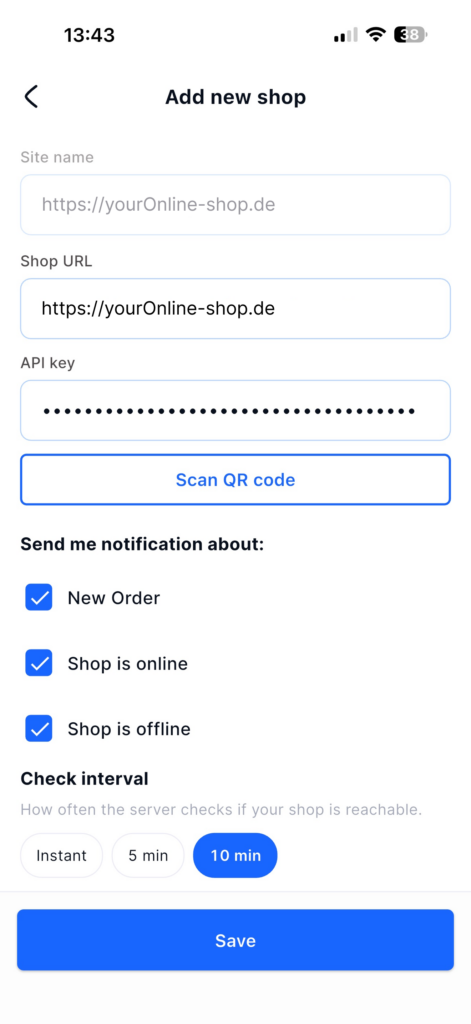
This screen typically includes fields such as:
- Site name
- Shop URL
- API key
Notification options can usually also be configured at this stage. Seller2Go’s public materials highlight alerts and shop-status monitoring as part of the app experience.
Available notifications
- New Order
- Shop is online
- Shop is offline
You can also define the check interval, meaning how often the app checks whether the shop is reachable.
Examples of possible intervals
- Instant
- 5 min
- 10 min
Step 2: Scan the QR Code in the App
In the app, tap “Scan QR code” and then scan the QR code that was previously generated in the plugin.
Result of the scan
After a successful scan, the required connection data is transferred into the app automatically.
In your workflow, this mainly includes:
- Site name
- Shop URL
- API key
✓ Note:If the scan is successful, these fields do not need to be entered manually.
✓ Important:Scan the QR code directly from the “Connect shop” section in the plugin, not the download QR codes for the App Store or Google Play.
Step 3: Define Notifications and Check Interval
Before saving the shop, you can choose in the app which events you want to be notified about.
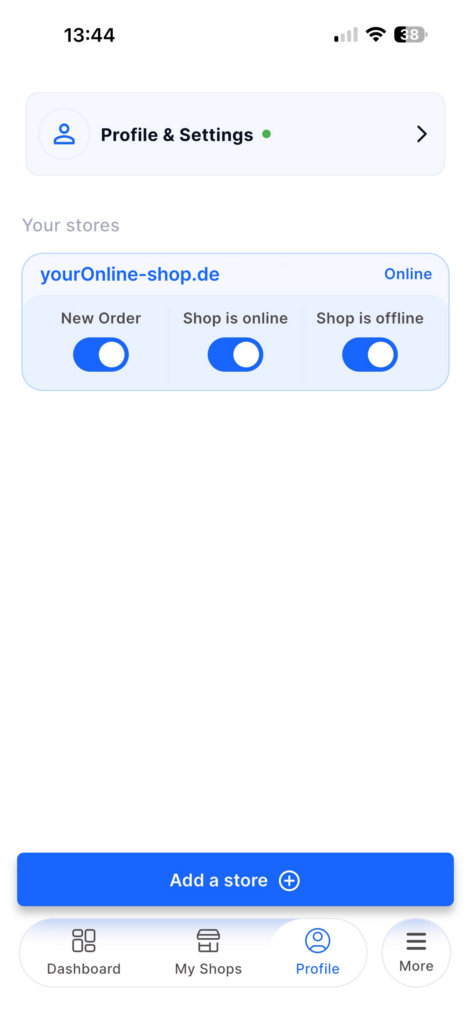
Typical options in this section
- New Order — notification for new orders
- Shop is online — notification when the shop is reachable
- Shop is offline — notification when the shop is not reachable
- Check interval — interval for checking the shop status
Select the desired settings and then tap “Save.”
Result of This Section
After completing these steps, the mobile app has been successfully connected to your shop.
Completed:
- plugin settings opened
- mobile app downloaded
- “Connect shop” section opened
- QR code generated
- app opened
- shop added in the app
- QR code scanned
- connection data transferred automatically
- notifications configured
- shop displayed successfully in the app
This means mobile use of Seller2Go is now set up.
Mobile app benefits
After the connection has been completed successfully, you can use the most important shop information on mobile as well.
Typical use cases
- quick checking of shop status
- notifications for new orders
- overview of connected shops
- mobile response to important events
- simple monitoring while on the go